
If you’re used to modern sandwich bread, jumping to historical leaven bread can be jarring and you might be convinced that it’s all horrible. For that I would advise making milk bread; The fat in the milk makes it much softer, and the extra sugars leads to airier dough.
What do you mean by milk?
While we do not have any recipes for bread in the 12th century, we do know that it was usually made in the evening. This would mean for the household cook, bread is a good way to use up any perishables left in the kitchen. Milk would be gathered in the morning, being first skimmed for the heaviest cream. This cream would then be made into butter. Leaving something akin to a mass market whole milk, but much heavier. If you’ve ever purchased whole milk from a farm shop, it has that weight behind it of slightly more fat.
For my milk bread I usually use whole milk. I have tried breads with “gold top” which makes a very rich bread much like brioche but similar in structure to whole. Any semi-skimmed or skimmed milks will lead to a bread that is more and more like traditional sourdough. Any nut milks will not contain the same sugars and fats and impart a vague flavour but little structural change. Interestingly, butter milk (the proper stuff, the off cast of butter making) makes a soft bread without the heavy taste. I would guess this is due to the butter making process removing fat but not lactose sugars.
The Recipe (With pictures!)
(This process is near identical for all breads, change stuff about to see what happens)
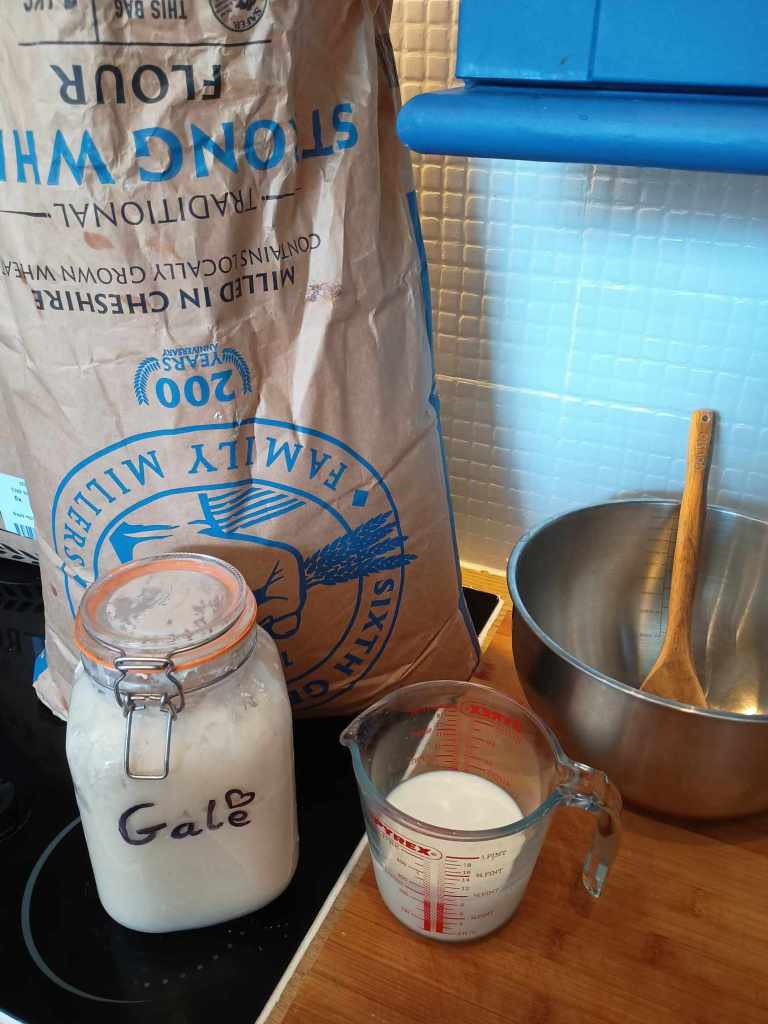
We only need 3 ingredients for this bread. Nothing crazy.
- 500g Flour, ideally a strong white bread flour.
- 200g Milk type of choice, whole is best
- 200g Leaven fed within the last day (Active sourdough starter)
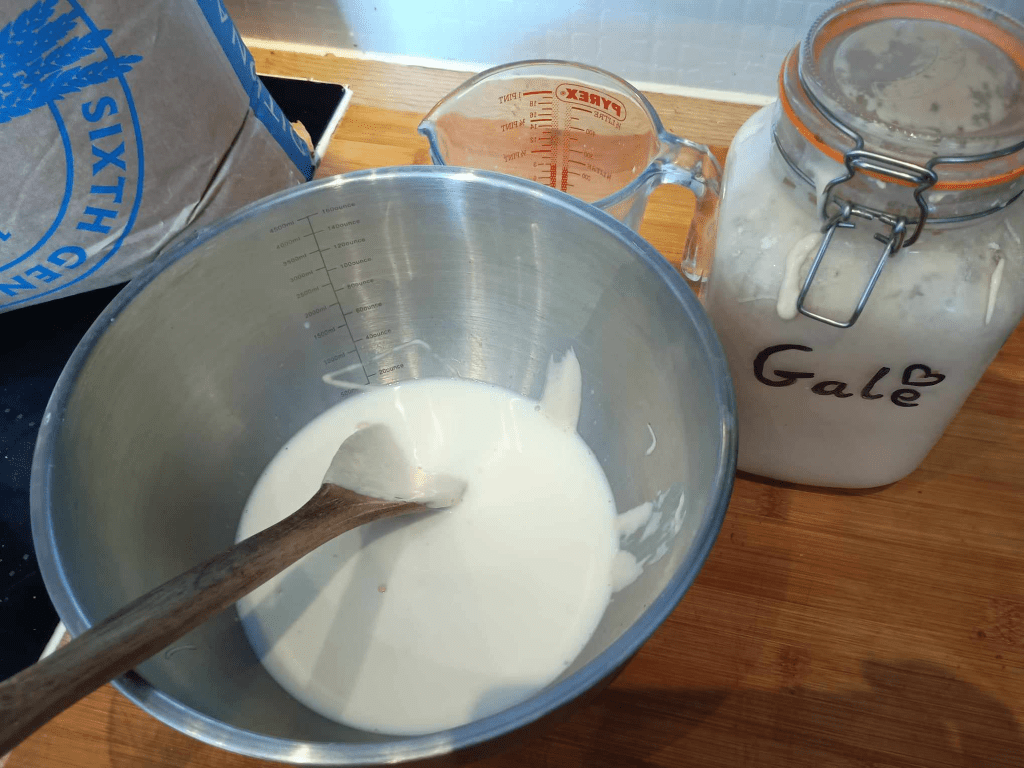
First, warm up your milk. You want it to feel above room temperature but not so hot you can’t place your hand in it comfortably. If you simply must measure it about 27°c and 29°c. To the warm milk add your leaven. Mix these together until it’s fully combined.
On top of your milk&leaven slop add the flour. And start mixing it into a dough with a sturdy spoon. Make sure to scrape the bowl constantly.
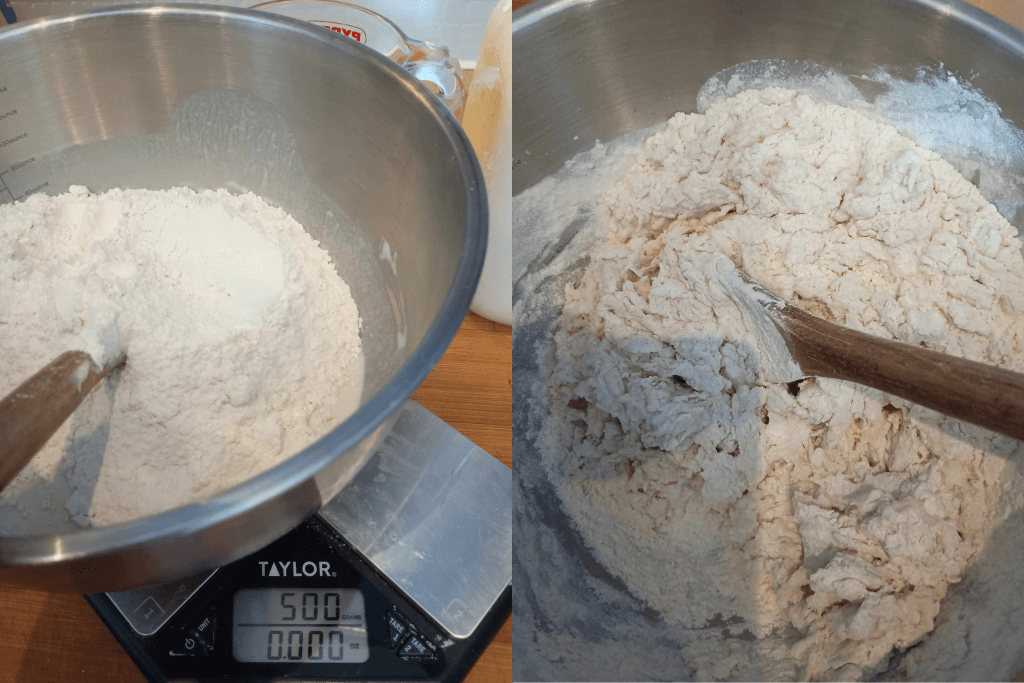
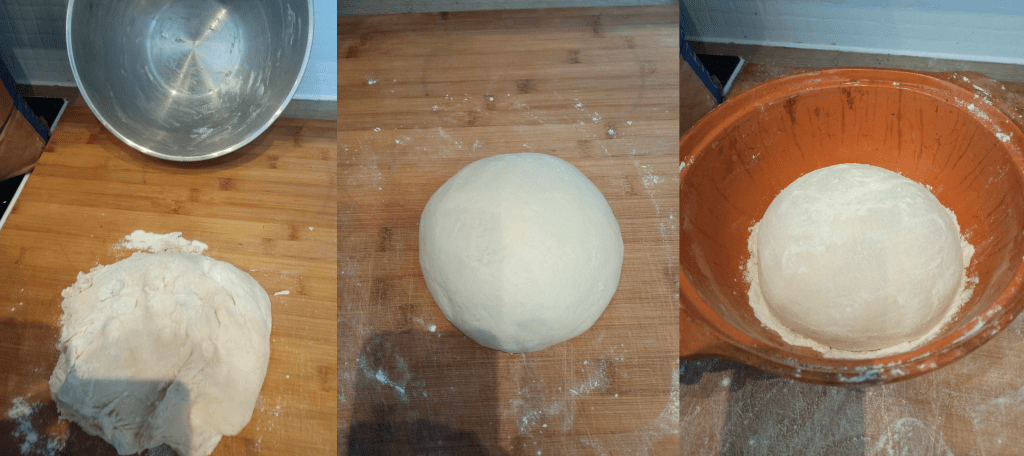
Once combined into a shaggy dough with the spoon you need to get your hands involved. If you get your palms or fingers involved too much you’ll find they get stuck pretty quick. Instead work the dough by ‘scooping’ and punching. Get your hand under the dough and lift and fold it in half; then punch this half flat.

Keep going scooping and punching the dough until it’s relatively smooth. It doesn’t need to be perfect as the rest will allow the gluten to develop and smooth the dough out. Cover it up, and let it sleep overnight. The dough needs to sleep somewhere warm, I’ve read some historical recipes that suggest tucking it in next to the dead fire. If you don’t have a dead fire, a slightly warmed (BUT OFF!) oven, the airing cupboard, or near a radiator is a good spot.
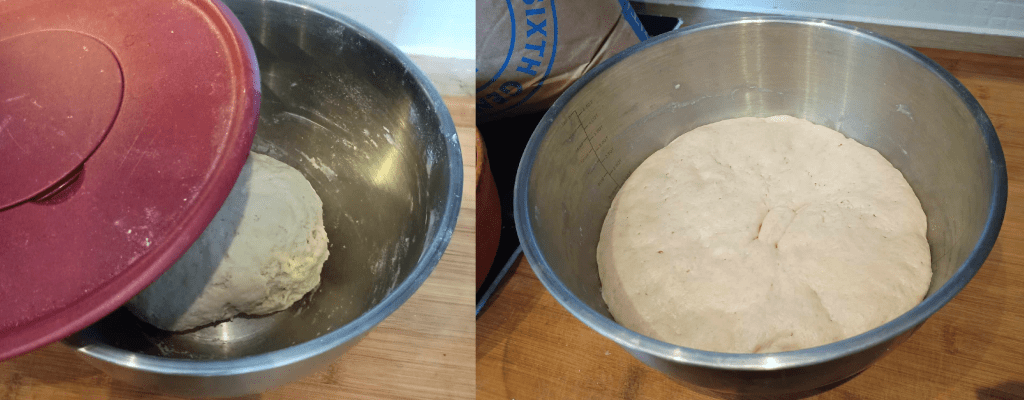
The next morning it should be roughly doubled in size, and helpfully stuck to the bowl. Scoop the dough out of the bowl onto a surface for kneading. I find it’s easiest to do this by dredging it with flour in the bowl and somewhat shoving the flour down the edges to stop it resticking itself. Once it’s out, start kneading the dough until it can hold it’s shape in a firm ball. Depending on the humidity of your house the dough will have varying levels of sticky, simply add flour until you get a good firm dough. I find it best not to throw flour at the ball itself, but to constantly ‘dip’ my hands in the flour bag.
When you have the ball prepped, absolutely smother it flour. I drop the whole thing in the flour bag but you can also just throw flour at it. Then put the dough into your cooking vessel of choice. (anything designed for cooking casseroles is good as it will distribute heat well)
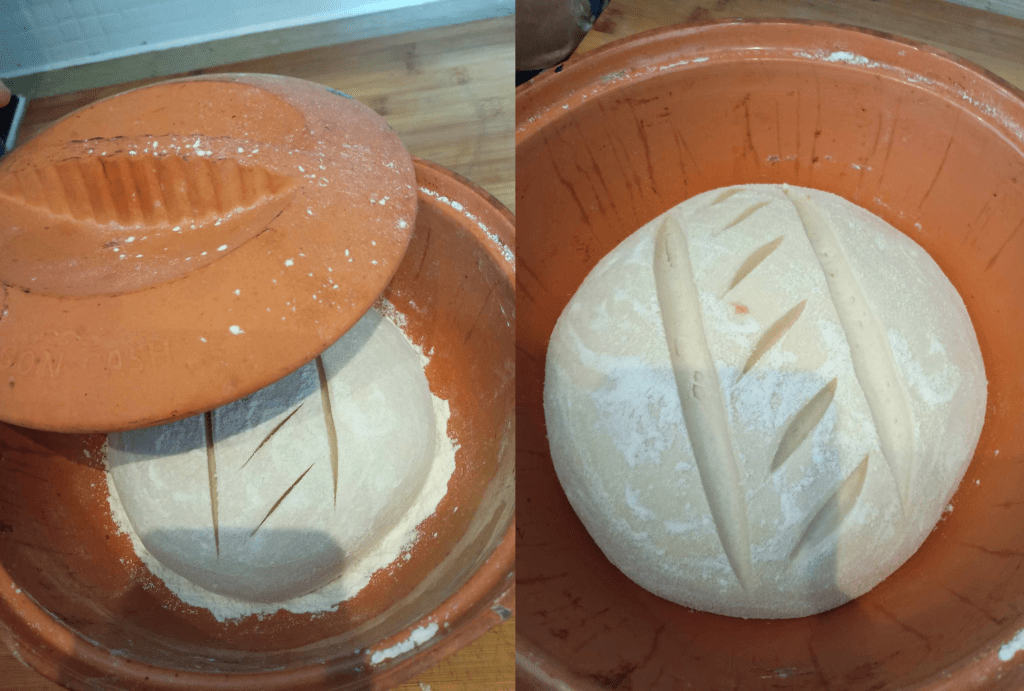
Sprinkle it with a bit more flour, and if you like add a little decoration to the top with a razor blade. Cover this up for an hour or so, again in a warm spot, to raise. Don’t leave it too long at this stage or it’ll suck up moisture from the air and need to be rekneaded with more flour.
Preheat your oven to 200°c. Triple check it’s at temp then slide your bread in for about 1hour. If you want a softer crust have it covered with a lid, or foil for the first 20 minutes. You can add another cut at this point to encourage the bread to split along a guided path, but I find it misbehaves anyway.
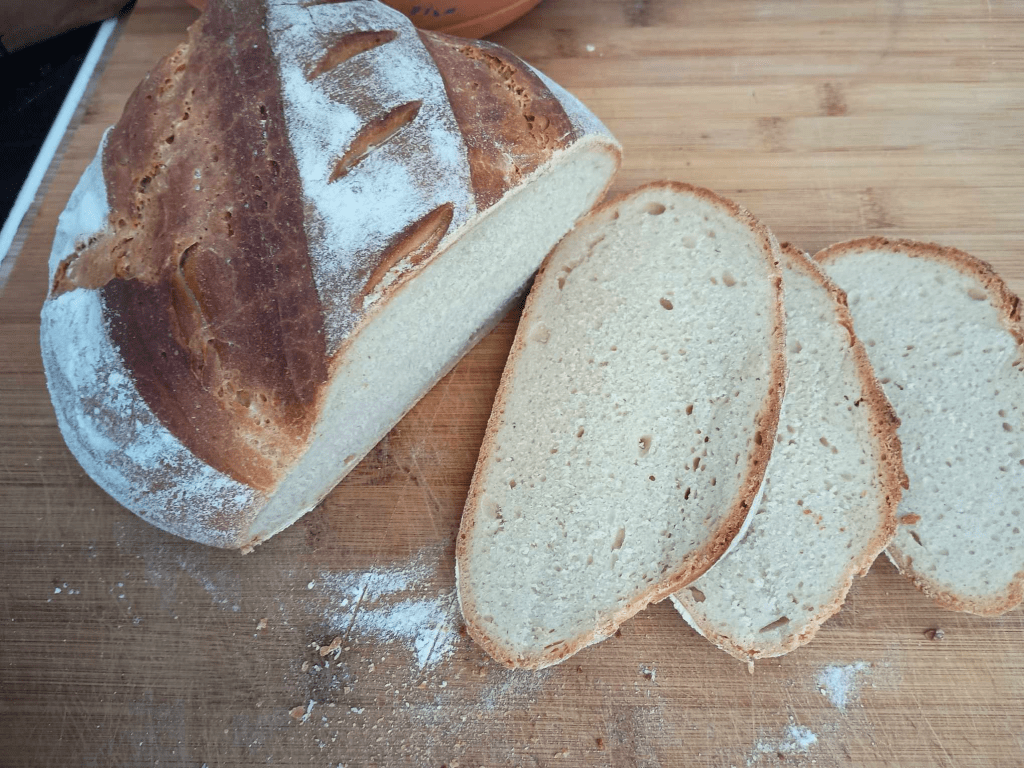
Once the hour is up, take out the bread and cover it with a tea towel. DO NOT TOUCH until completely cool. Place it on a window ledge or drafty spot to speed up, but never the fridge. I find it helps to leave the house entirely so the intoxicating scent of fresh bread doesn’t cause me to cut it early.

After it’s cooled entirely, you can cut into your lovely fresh bread. And see all your hard work reflected in your soft white sandwich bread. The added fat in this bread means it doesn’t really need butter, and is very good with just some jam or cheese. And of course it’s amazing dipped in pottage!

Leave a comment