Draping & Cutting.
Now most garments in period would be made by simply draping fabric over the person, a practice given the obvious name of ‘drapery’. This allows someone who is entirely illiterate and innumerate to create clothing. Unfortunately, this relies on you having a very still willing person to be clothed, and the one performing the drapery being the one with the knowledge. Which if you are single, or need to make kit for the one person who knows how to drape this isn’t great.
Because of this most modern people resort to mathematically breaking down patterns, allowing them to draw them out with perfect calculations like a modern pattern drafter. But I argue this step is entirely unnecessary and you can perform the drapery on yourself easily assisted with only a measuring tape.
Note!
I use a measuring tape to perform around the body measurements in these steps. However you can just as easily use a bit of ribbon, string or paper strip. When it comes to halfing measurements you can fold the string in half. And to add inches for ease simply guestimate.
Using the tape measure simply makes it easier to drop the measuring thingy and remember where you ‘were’ on it. You can make marks on the string to help with this using a pen, clip or safety pin.
Cutting the body
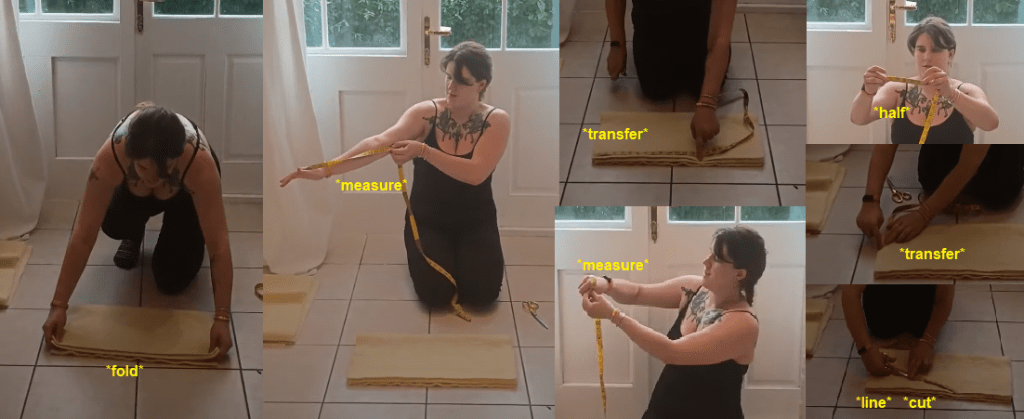
The first part we will make is the body, as this is the biggest use of fabric. If your fabric is long enough you can cut the body in one part. As I am working with a blanket and I’m quite tall I have to cut my body in two parts. For cutting in one part, fold the fabric in half and match the fold to your shoulder top, Follow the rest of these instructions but you can skip cutting to width a second body.

Start cutting the body by holding up the fabric to your self. Have one edge resting on the ‘middle’ of your shoulders. It can help here to wear a t-shirt, you can align the edge with the top shoulder seam.
Once held up, Step on the fabric, holding what would be the hem with your toes. Let go, and reach down to where you have stepped. Pinch this part of the fabric and ‘follow’ it out to the edge, Cut and tear to create one long strip that will be the correct height for your height.

Next, measure around the largest part of your chest. Don’t measure tight, give the tape some room to move about. Halve this measurement, and add about an inch to it once halved. Transfer this measurement to the correct height length, snip at the mark and tear. Repeat this for the second panel.
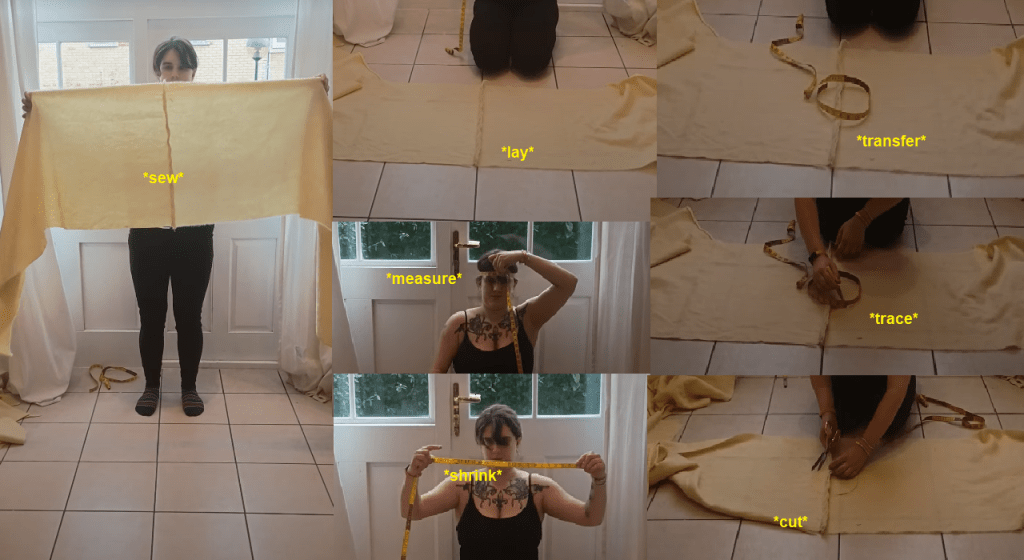
Run a quick stitch, or pin together your body panels along the shoulder seam. Then lay this down on the floor so you can work on the middle part, you can roll up or scrunch the remaining length if there’s not enough floor.
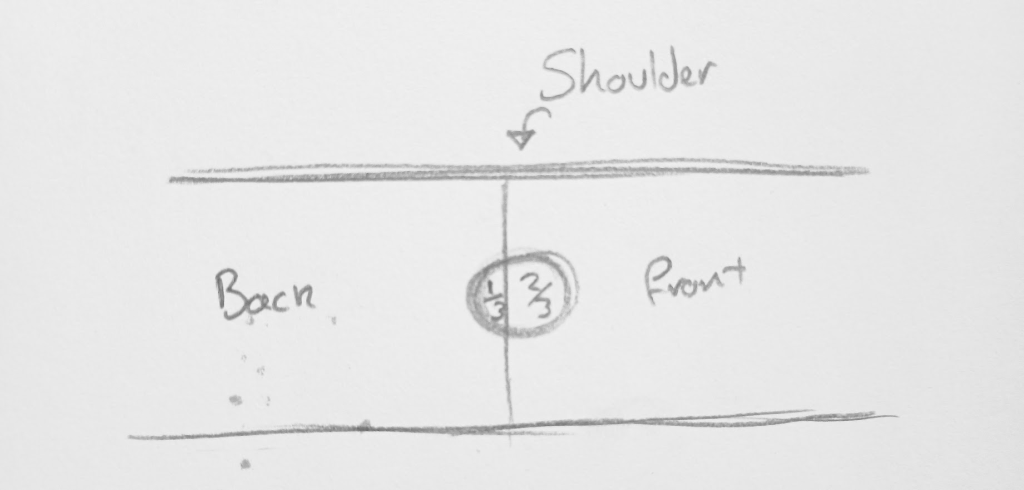
Measure around your head, pulling as tight as possible. Take this measurement and shrink it by an inch or two, this will account for how the hole ‘grows’ when hemmed. Form the tape back into a circle with the new measurement and place it a third of centre. Trace this circle and cut out.
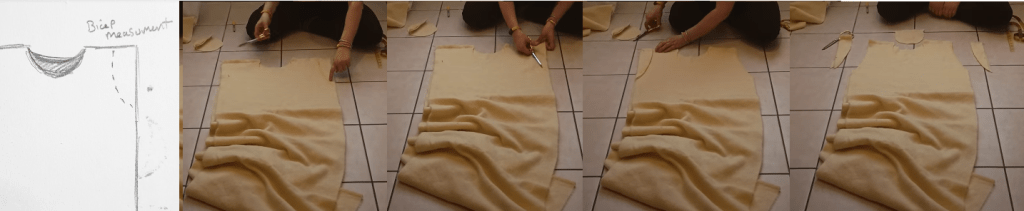
Next take your bicep measurement, and half it. Using the tape, shape it to a gentle curve into the side of the body panel. Cut this out, and to assure it matches use the cut off part to cut out the other side.
Cutting the sleeves.

To start cutting the sleeves, locate a remainder of your fabric, (in this case the long strip removed when cutting to height) and check it has enough to go over your arm with plenty room.
Measure your arm length by grasping the tape in the ‘thumb armpit’ and bring this all the way back to your armpit. Transfer this measurement onto the fabric, and tear out two sleeves.
To make the shape of the sleeves we need a measurement from; Hand to Elbow, Fist, Bicep. Fold the sleeve fabric in half along it’s length, measure from hand to elbow and mark this on the cloth with a snip or pen mark. Next, measure around the fist, and around the bicep, half these measurements and transfer them to either end of the fabric. Like the image below,
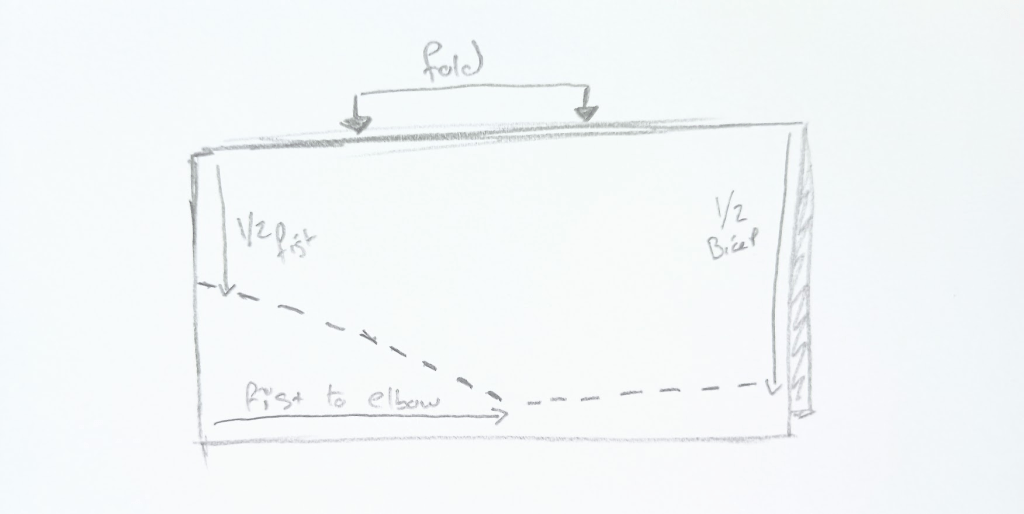
Using your measuring tape, a ruler or sheer guessing: Cut at an angle down to the bicep measurement, until you hit the elbow point. From the elbow point start cutting straight to the other end.

The armpit gores/gussets can be probably be cut out of the angled scrap. Layer all four scraps together and measure this out to a right angle triangle. Cut these out to reveal 4 right angle triangles.
Cutting the Gores.
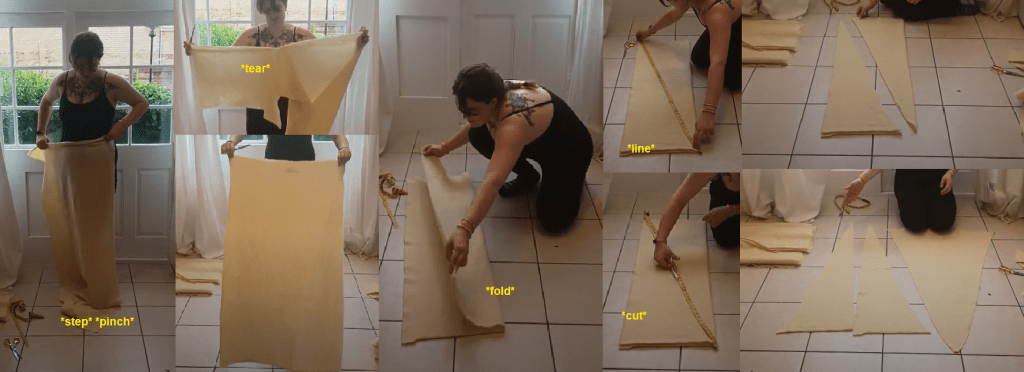
Choose a part of remaining fabric with a width around that the same as your body panels. Following the ‘step’ trick the same as for the body, this time with the fabric edge held up to the waist.
Once you have a panel for the gores, fold this in half along the height. Using a big ruler or your tape mark from the top left corner to the bottom right. Cut along this line.
Opening it out, you now have one whole gore and one gore in two parts. Very economical!
Complete!
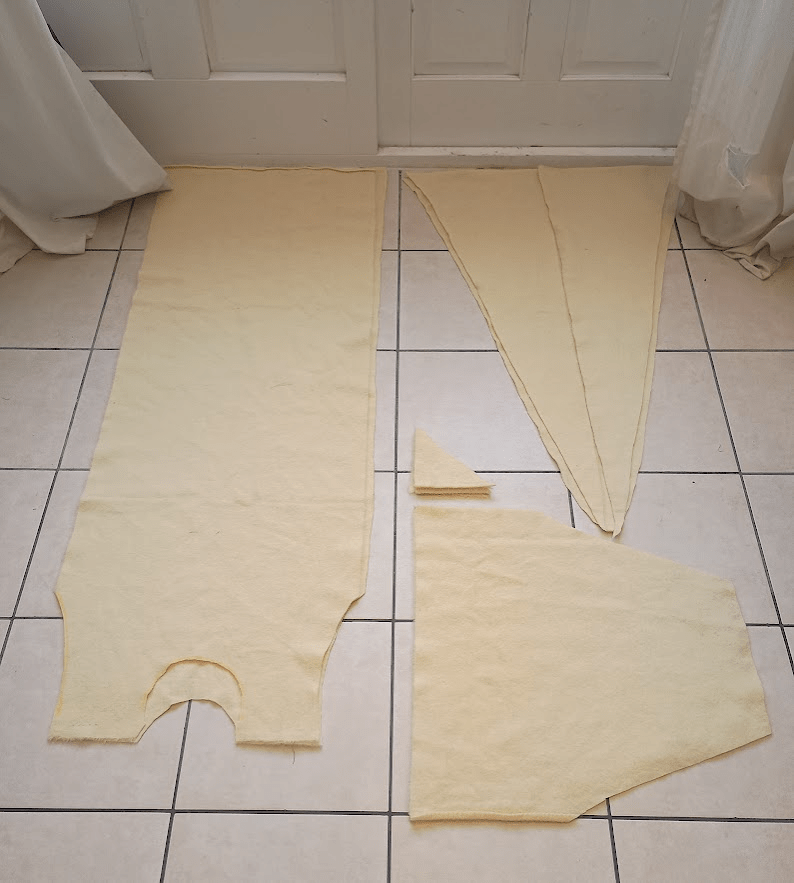
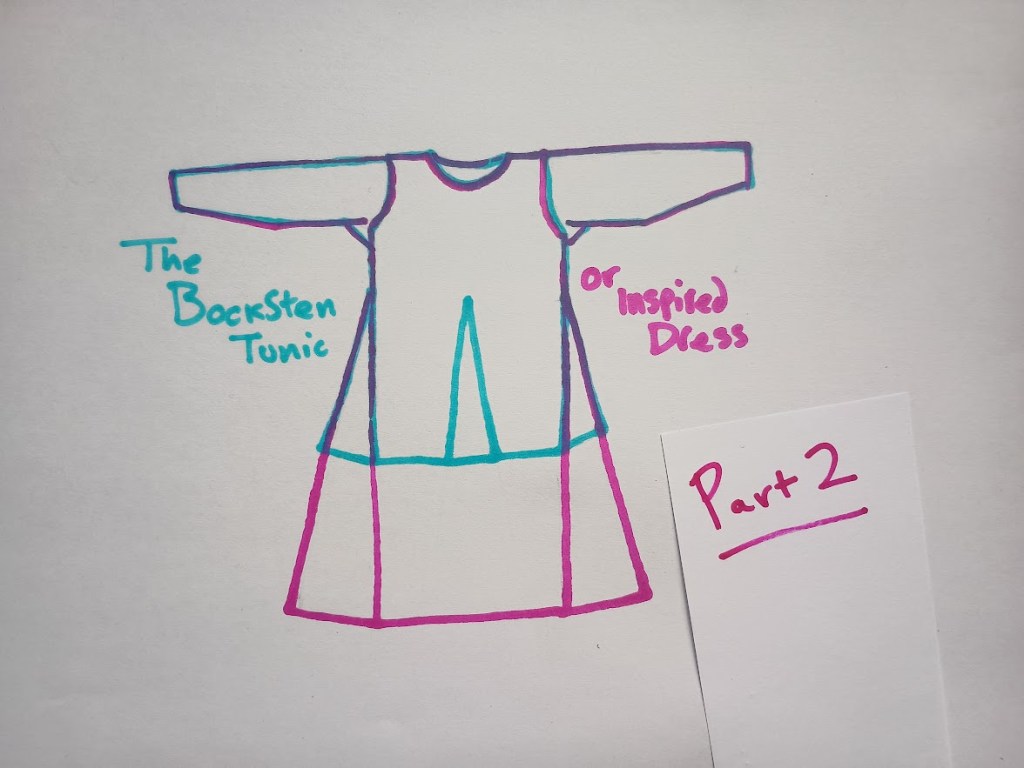
All the parts cut out, we can see how this resembles the Bocksten man’s tunic from Part 1. In Part 3 I will be talking through how to assemble these together, using historically accurate methods.

Leave a comment