
Before we start sticking together our pattern pieces we need to know how to sew ‘authentically’. Most extant garments we have, have fallen to pieces. So how these are sewn together has to be interpreted from a few surviving ‘whole’ examples. These examples consist of a massive array of different ways to join folded, selvage or raw edges. There was no formal school of sewing, and every specific region would likely develop a slightly different method as mother taught daughter or someone simply guessed how to do it independently.
Running though all of these methods of sewing would be time consuming and mildly insane. If you are interested, a lady called Heather Jones has done an amazingly detailed breakdown of different methods.
To decide on a consistently achievable ‘authentic’ method I practiced a few until I found that a simple running stitch paired with ‘felling’ to one side is the most durable and time efficient method.
From Heather Jones’ Archaeological sewing.
Medieval: Wool, overlapped: either running stitch then the raw edges paired and hem stitched to one side, or similar but both stitch lines hem stitch. [Hägg 1984, Hedeby (northern Germany), (19)]
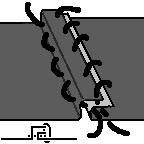
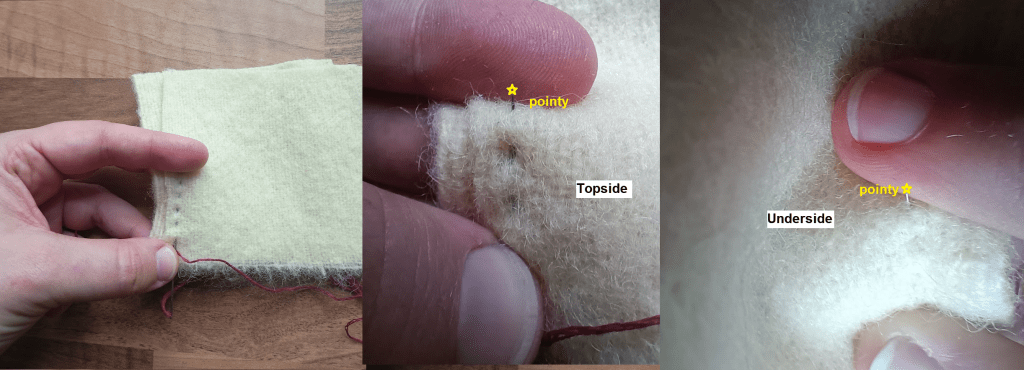
What is a felled seam?
Looking up felled seams on the internet or in a modern sewing class will bring up all manner of assembly methods. The modern sewist will usually bring up the type of felled seam seen on jeans, this is not a good historical method of sewing; And will leave an ugly running stitch on the outside. The word ‘felled’ in regards to a seam only means that the raw edge has been folded in some way, and sewn in some way so a felled seam can be one of many combinations.
The felled seam I talk of, is after a running stitch is run, a whip stitch is done with the seam allowance to one side. This makes an incredibly strong seam. Distributing force over your initial running stitch, but also over a much stronger form of whip stitch.
This creates a sort of directional ‘bump’ in the fabric. This bump leads some people to want to fell their seams in an ‘open book’ method, which while looking nice completely removes the strength advantage.
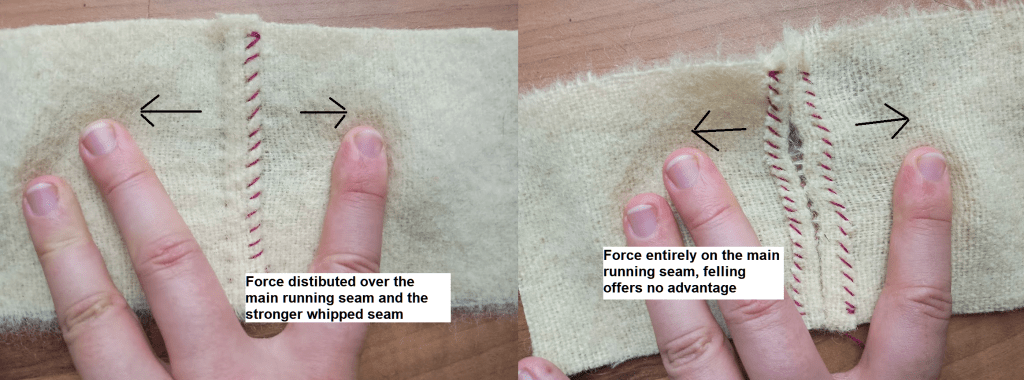
This form of felling has it’s place, in seams that never see stress such as those on larger skirts and you want a flatter appearance on the outside. But this massively increases work time (a whole extra length of whip stitch), while decreasing the life of the seam. So I would say this is an ineffective method of assembling garments.
The all purpose felled seam, in steps.
There’s only so much detail of a sewing method that can be included in pictures. But I will do my best to explain the exact method I use on all my seams. I am using a glaringly contrasting thread here for ease of sight, and to show how little it should show on the right side. A lot of this is based on feel, and much like an instructional written guide on bike riding this will only get you so far without practice. So sit down, grab the needle, and jump right in. Sewing is the only way to get better at sewing!
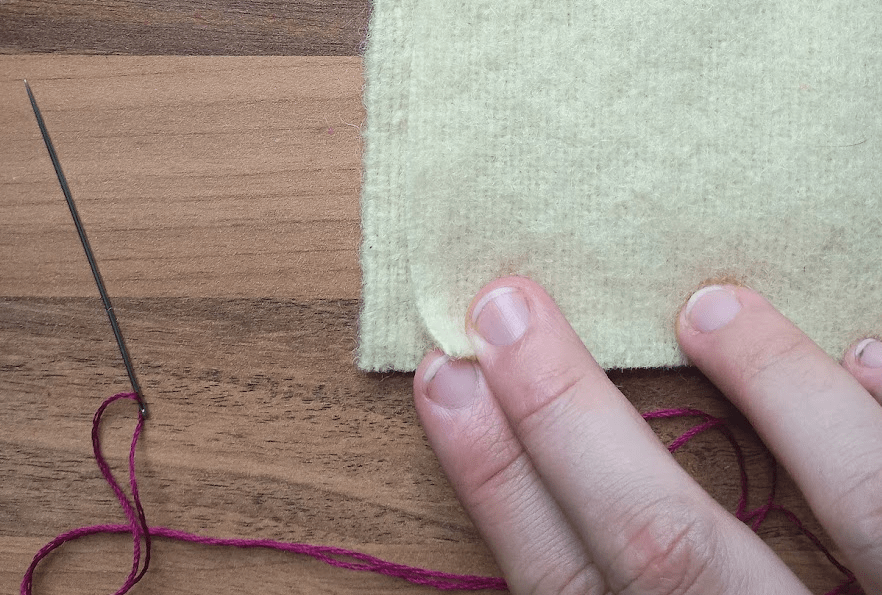
To start with, lay the fabric slightly off. You can perform all these steps with edges matched and trim one side down after the fact, but I prefer to reduce this tiny amount of waste. If you are not confident the fabric will stay in place, pin or clip the cloth in position.
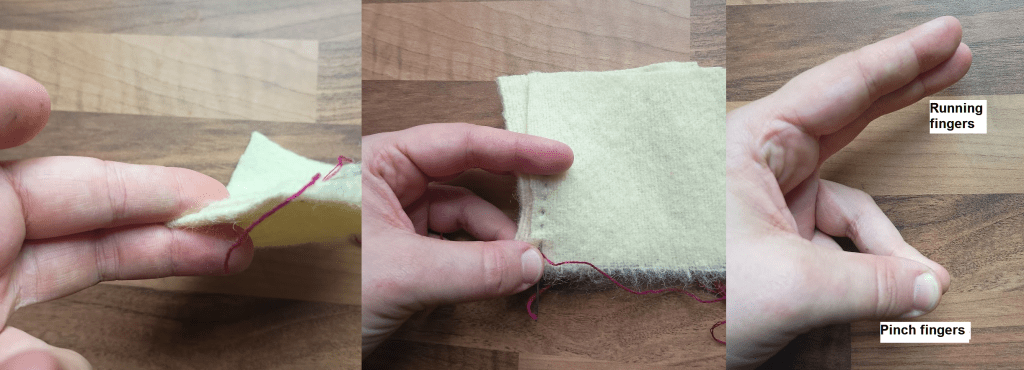
Holding the fabric correctly can massively increase your sewing speed. Imagine your hand as having two sets of ‘holding’ fingers. Your thumb and ring finger are the main holders, these do not move. Your pointer and middle finger are ‘running fingers’ and hold the fabric straight for you to run the stitch. You start with your running fingers rather close to the pinch fingers: As you run the needle through the cloth these fingers walk away along with the point of the needle.
Start running the needle through the fabric. To achieve the smallest stiches possible I use the ‘ouchie’ method where I simply stab myself repeatedly. (I kid, you should stop before the needle actually gets you). You have an upper and a lower running finger, these serve as your feelers for the needle point. Push the needle through, as if you’re going to stab your respective finger. Right as you feel the point, change directions. Repeat this feel with upper and lower fingers, shifting them a little upwards with each stab. The amount you shift your fingers will determine the stitch length so really try to wiggle a tiny amount.
NOTE! This method will probably tear up your finger skin when you first start. Due to having to feel the needle point you can’t really do this with a thimble on. I advise getting a good working hands moisturiser and developing callouses.
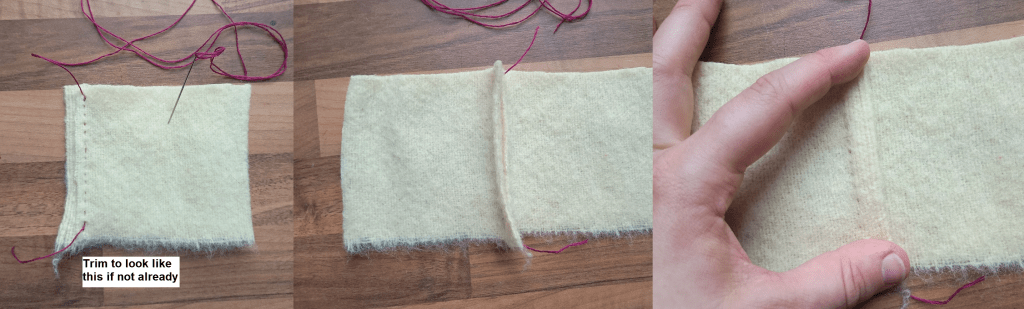
Once the running stitch is complete, open out the seam and flop the longer seam allowance over the shorter. Again here you can pin this in place.
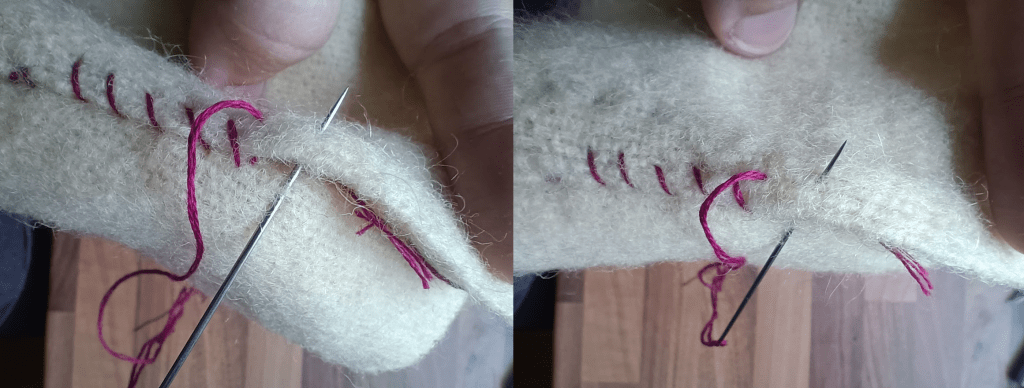
The trick to a really good looking whip stitch is to catch the main fabric as little as possible. And to catch the hem with a good amount of room to ‘grab’. Push the needle through the main fabric as if you are going to stab your finger as before. The moment you feel the point, dive back up. This will create a tiny stitch which on most fabrics should be invisible (especially with matching thread).
Once you have your anchoring stitch on the main fabric, push in a good 1/2cm or so into the hem and pull taught. You should continue these stitches all the way up. Always keep the needle at 90 degrees to the hem and move up in regular increments, this will assure a nice neat whip.

The seam is complete! turning it over you should only see a small ‘bump’ in the fabric where the felling has been completed. When you first start you will likely see some thread on the front side, don’t worry you will get better in time.
Assembling the dress
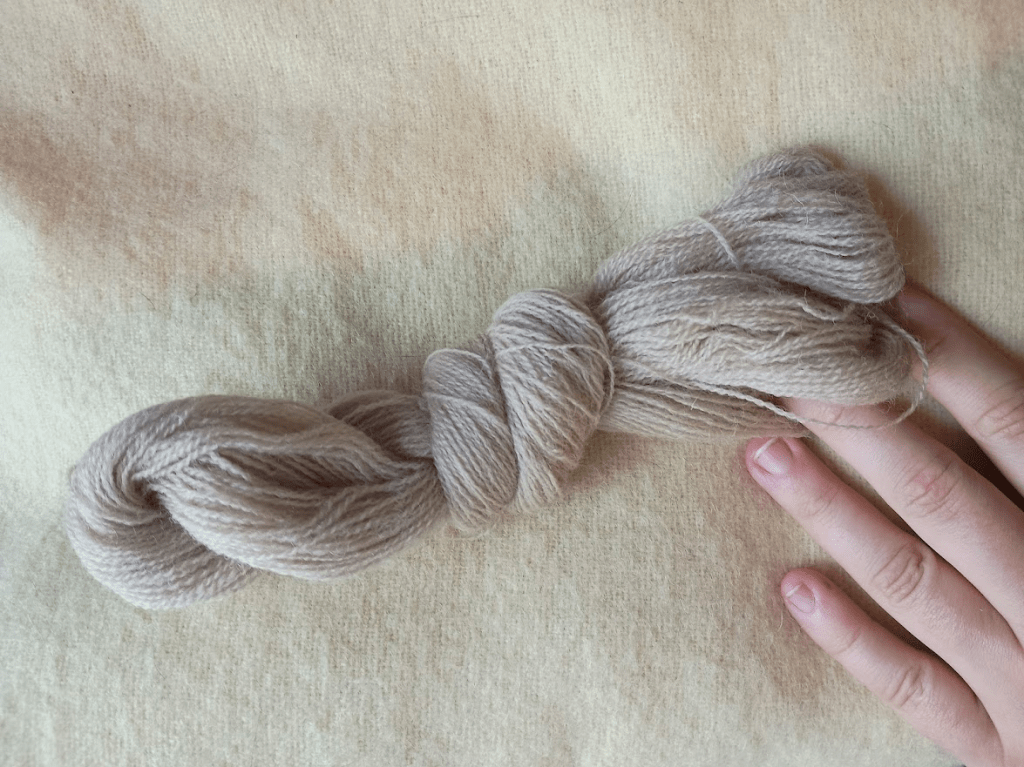
Its best to use like for like thread when sewing. This wool dress will be sewn together using wool thread. I don’t have quite the exact butter yellow shade but taupe is close enough for the tiny parts that will show.
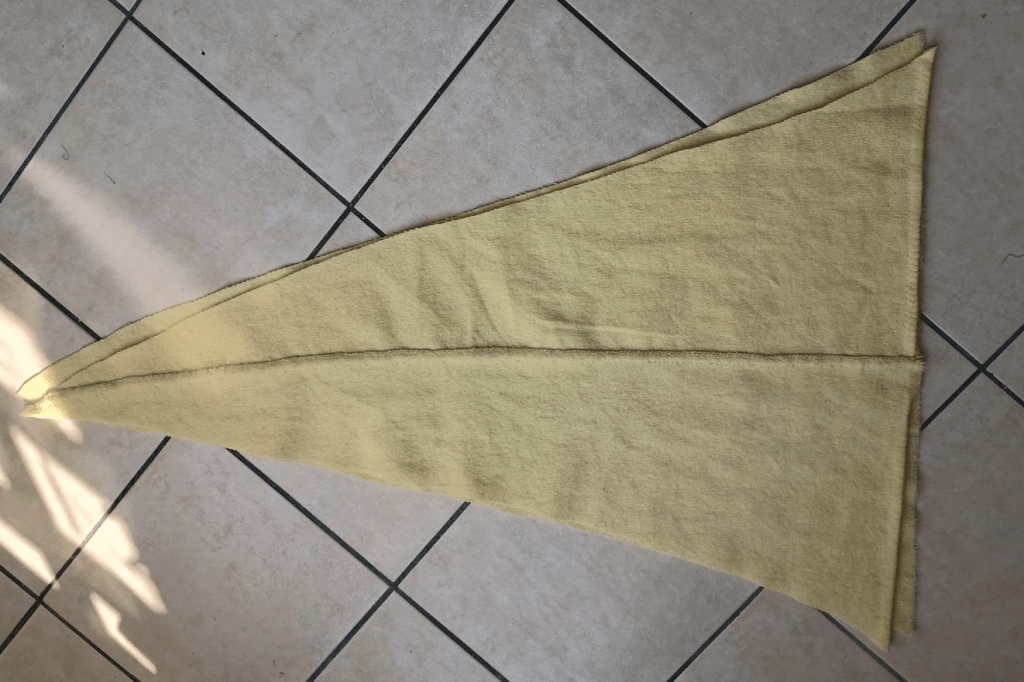
The first step is to make the ‘split’ gore into a whole one. Sewing together the two right angle seams. Once this is done this part can be treated as one whole piece.
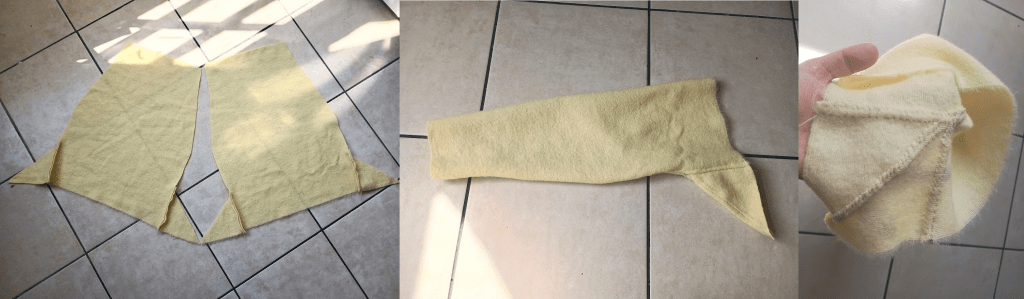
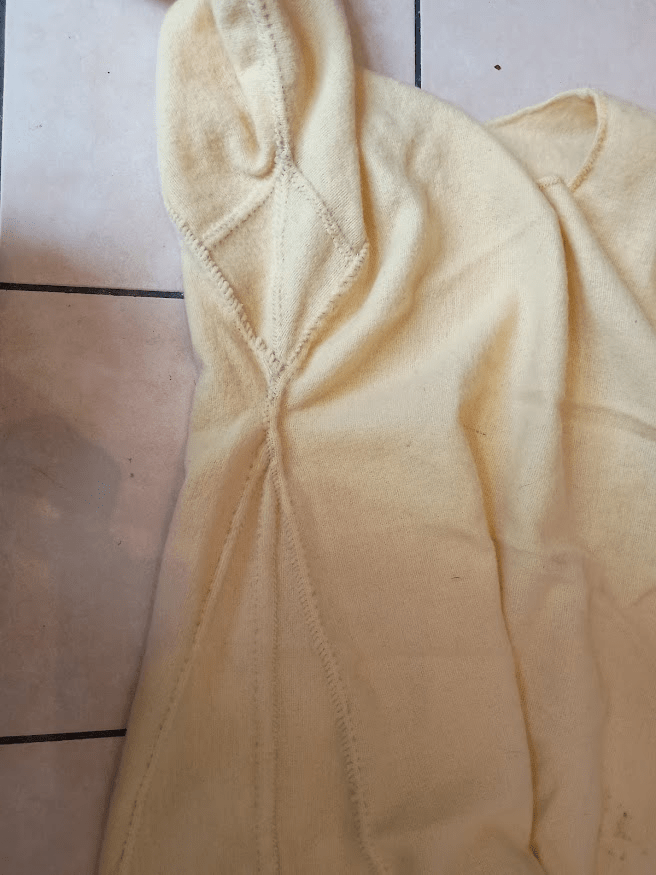
Next up the sleeves, The triangles are sewn to the sides of the sleeves so they resemble little rocket ships. Then the whole sleeve is folded in half and sewn shut. Note the felling is arranged to lap over internal corners and seal everything in.
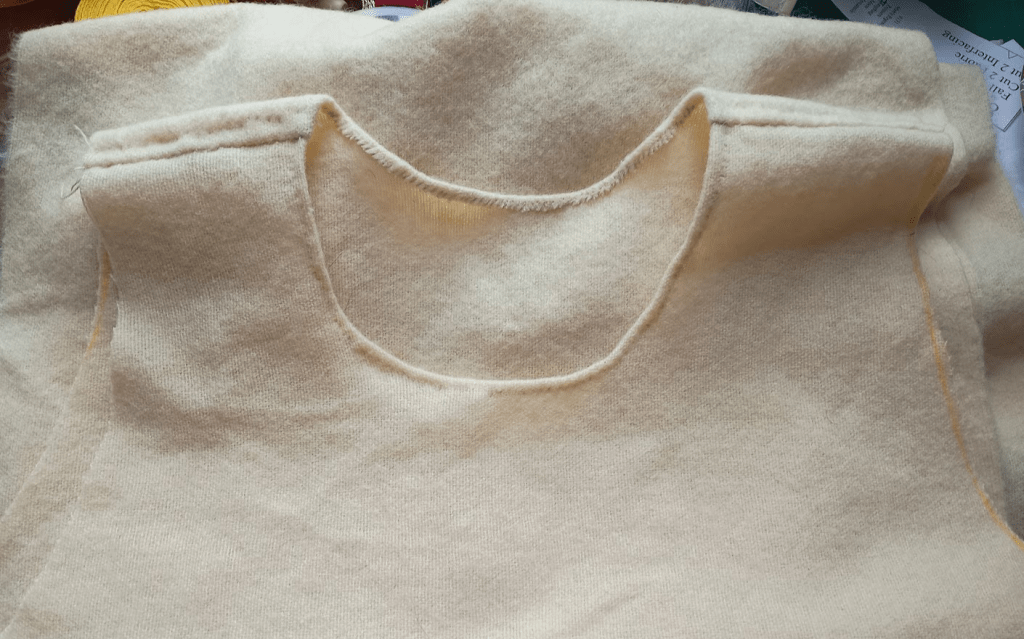
The two body parts are made into one, and as part of the felling process the neck hole is also hemmed.
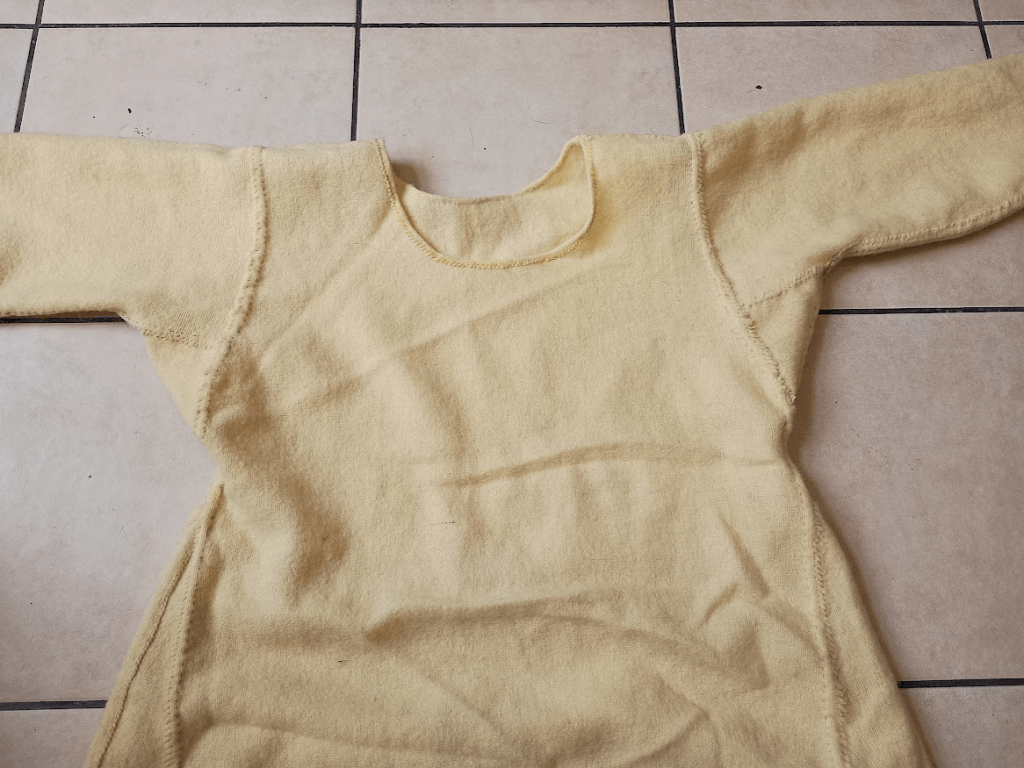
Now for the final assembly. Starting from the shoulder seam and the top point of the sleeve I work down towards the ‘tip’ of the underarm gore. Then of course finish the seam by felling it down.
Sewing in the skirt gores is very easy into side seams. Just a very long running stitch down the body and finally felled down. See above again for how the felling is done neatly to encase any raw edge. This not only looks neat, but makes it very strong.
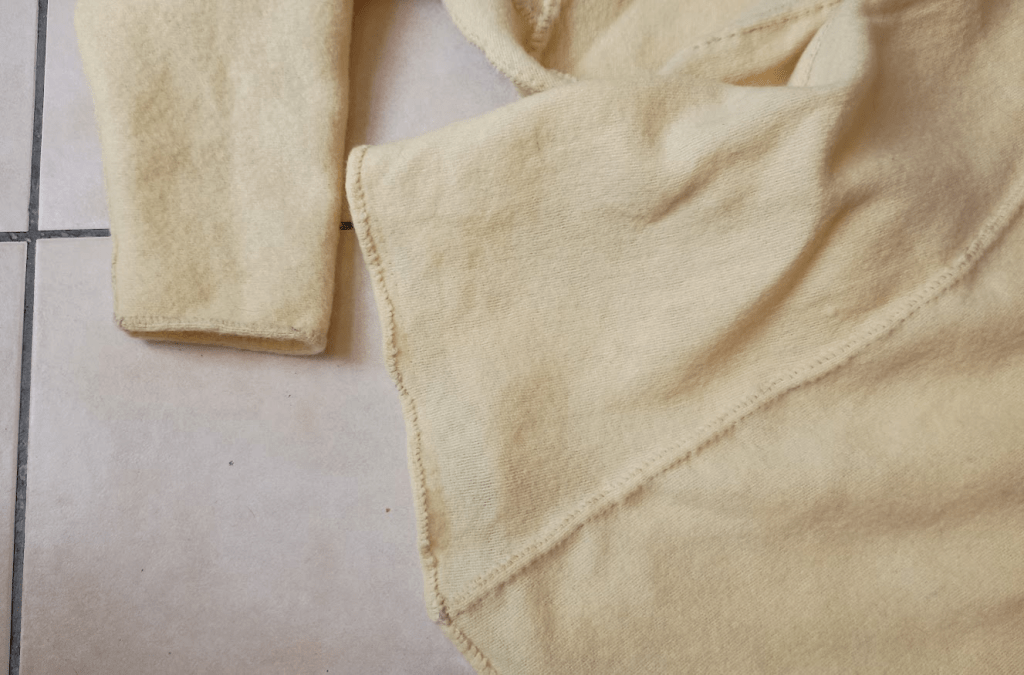
The edges are then all finished with a very basic whip stitch. As this wool is very prone to felting I haven’t bothered to double fold the hem and simply whipped the edge down. After a few wears and washes this should homogenise into the main fabric and be very sturdy.
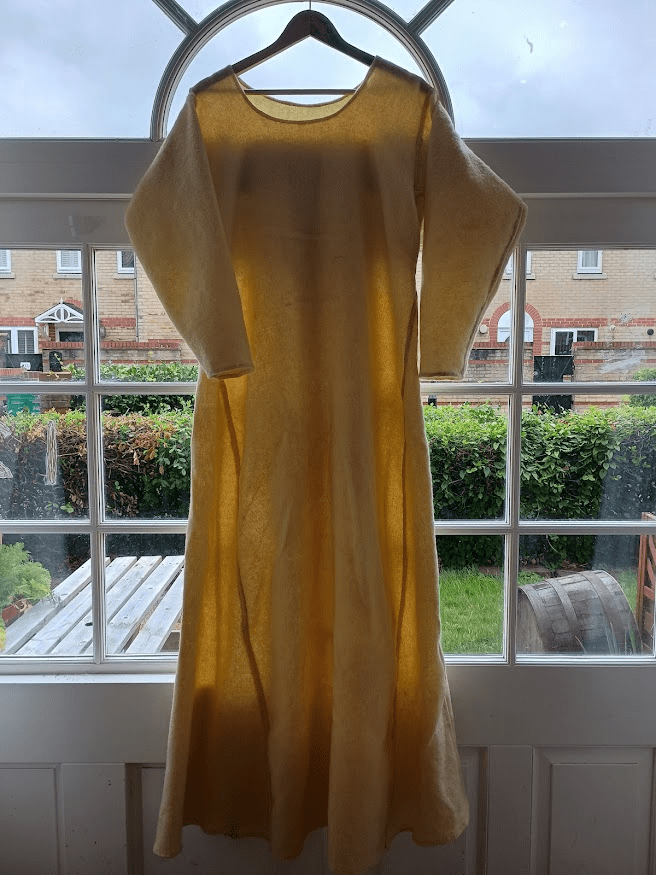
And that’s it! Very simple to measure, cut, and sew together and ready to wear for many medieval events. I’ll try to update this post when it get’s it’s time in the sun.

Leave a comment