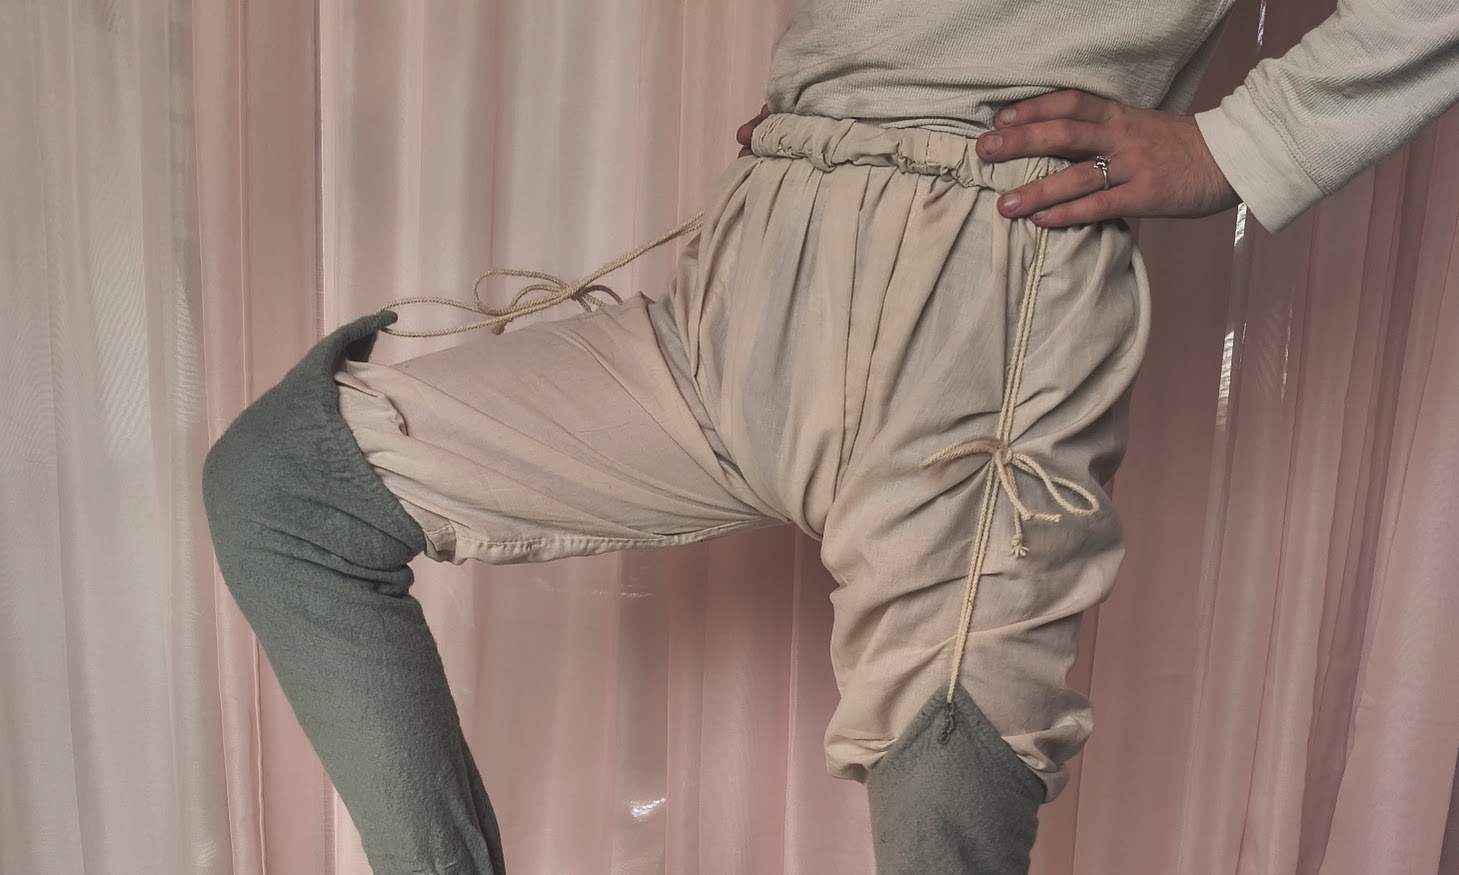
My braies guide, here, is rather old. And one of the requests I get from people asking for help is always ‘how exactly does that go to that’ or ‘where does that go’ which is only so explainable with words.
I’ve been telling people I’d make this for probably 2 years now; And finally got round to making some new braies for my partner willing guineapig; so enjoy this detailed photo guide on making some high medieval unmentionables.
This guide is designed to be followed through beat by beat. Review the whole thing first, and then I suggest just scrolling to follow along the process.
Measuring
The measuring side of making braies isn’t an exact science, and depends heavily on the build of the wearer. The method I describe in my other guide of measuring the thickest part of the thigh and tripling it works for most. However if your personal thigh-waist ratio is out of whack it can lead to a poor fit. I observe this with myself as I have weirdly small skinny thighs, so I must add some inches.
For the above reason, I am switching to a new method of two different measurement options. You will need to measure your waist and the meatiest part of the thigh. Then double the waist, and triple the thigh, and whichever is largest use that measurement going forward. This will be ‘A’.


Measurement ‘B’ will be the length from your waist to your ankle. “but I don’t want my braies that long!”, they will get shorter as we’re sewing I promise. (if they’re still to long for you, you can cut some from the hems).

Cutting out
Using the A and B measurements you can now cut out a very large bit of fabric. This will seem huge, that’s important. There’s no stretch in linen, so any movement you do has to be accommodated by more cloth, and legs move a lot.


Next we need to cut out the flap that splits this into the crotch and legs of some braies. I will show this below in both cloth and with a piece of paper. The paper has a hexagon design one side to help you see the folds.
The dotted lines mark half way on both the long and short edge. The solid lines are a measurement of 1/4 of A which is centred on the cloth. The easiest way to get these lines is to divide A by 8 and measure that out from the middle line. This looks a big scary here, but when you scroll down to the cloth example I’ll show you how easy it really is.

You then need to cut this quarter out only up to the half way point like so:

And this flap can be folded upwards, and the remaining cloth inwards to create braies!

Here’s an image of the folds half way done, to help show how the cloth should be folded.

So again from the top with cloth now, We first fold the cloth in half on the A axis. Divide your A measurement by 8 (for our guineapig this is 7.75). Then cut up the black line seen here half of B (18″ in the example).

Open that fold back out and we have all the cutting we need to do for this pattern.

Now we do the folds previously illustrated. Middle flap up, sides into the ‘flap line’

Sewing it up
Onto the first bit of sewing now. Attaching the legs to the flap for the first half. Then the legs to themselves past the crotch fold. It can get a bit wonky in the transition. Just make sure there’s no gaps and power through, no-one will see this sewing unless they’re too close anyways.

And that gets us to ‘checkpoint 1’. Where you can try on your braies for the first time. (or make the guineapig try them on). See how they’re already shorter than that ankle point! And also see how it’s fitted well to the leg but with lots of room for movement in the seat.

Next up we need to hem the ends of the legs. As they’re going to be trapped in the waistband in the next step, it’s also a good idea to do any felling you need to do here too.

You have a lot of options for holding the braies waistband: a cord, a tape, or my choice the belt. Decide what you’re going to use and get it to hand.

To make the waistband, take the top raw edge and fold it down twice. You need to assure these folds create a channel that’s got some wiggle room for your chosen belt/cord/tape.

You can eyeball this as you go, but it may creep too large or small. So I suggest pinning this waistband all around and checking that it stays consistent.

Now onto our next big bit of sewing. Go around the edge of this hem/channel and whip stitch the bottom edge down.

Turn the braies right way out, and lay them out. We now need to snip the holes for the belt/cord/tape to get in and out of the channel.

Slip a small pair of scissors about an inch or two from the centre front and snip. Make sure you only snip through the outermost layer, so it creates a hole into the channel and not cuts straight through the channel.

Then run a tight whip stitch around these raw edges to create a sturdy hole.

Next up is the cord that holds the hosen up, for this I use 2mm wool cordage. Cut out two long lengths that are about twice the height of your braies.

We are going to attach these cords to the front of the waistband, towards each side. This is done instead of straight on the edge as it will make the cord sit more to the front when wearing, making tying up the hosen a lot easier.

Take an awl, small pair of scissors or a particularly sharp pencil and poke two holes an inch apart. Make sure you are just opening up the weave and not cutting or tearing the holes, this will make this attachment more sturdy.
Once the holes are made, thread the cord through and tie it in a knot.

Now the braies are almost entirely complete. We just need to feed the belt in. If you are using a cord or tape, I recommend using a big safety pin to guide or you can get a purpose made drawstring inserting tool.

With the belt fed all the way around, the braies are complete!!

You (or the guineapig) can now try on your lovely new ye olde trousers.

Someone asked me about how the rolling of the waistband works on my other guide. You essentially just fold the belt ‘outwards’ again as many times as needed to shuck all the cloth into the crotch. Here’s my guineapig doing this as a way to tuck in the belt end. The belt is wrapped around the waist and then the waistband is rolled down over it.

And with that run free into medieval reenactment with your unmentionables now covered.


Leave a Reply